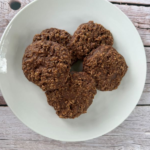
No Bake Oatmeal Cookies
Super simple dessert that only takes about 10 minutes to make.
Servings: 12
Equipment
- Wax Paper
Ingredients
- 8 Tbsp Melted Butter (one stick)
- ½ cup Milk
- 2 cups Sugar
- 4 Tbsp Cocoa Powder
- 1 tsp Vanilla
- 2½ cups Oatmeal (quick oats)
- ½ cup Peanut Butter (optional)
Instructions
- In a large pot, melt one stick of butter over medium heat.
- While the butter is melting, lay out a piece of wax paper (about 2 feet long) along the counter.
- Once the entire stick of butter has melted - add milk, sugar, and cocoa powder. Increase heat to medium-high.
- Once the mixture starts to boil (full boil - not just a few bubbles), set timer for 2 minutes. Do not stir while boiling.
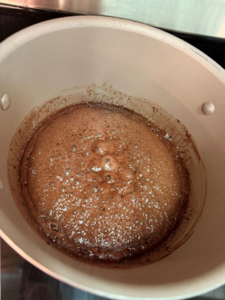
- After the 2 minute boil, remove from heat and add 1 tsp of Vanilla (stir) and 2½ cups of oatmeal. Mix well.
- Drop the mixture by spoonfuls onto wax paper.
- Let cool until cookies are firm (usually 15-20 minutes).
If you are using peanut butter, you will add it after the vanilla.
(I use a cookie dough scoop and then "squish" them down with the round part of the scoop so the cookies aren't too mounded up).
Lift up the wax paper off the counter to test if the cookies are set.